You are here
Updated features in KENET Web Conference Platform v2.3
- Posted on: 25 October 2021
- By: admin
The KENET web conference platform runs on BigBlueButton open-source software and supports real-time sharing of audio, video, slides (with whiteboard controls), chat, and the screen. The platform is interactive as it allows instructors to engage remotely with students using polls, emojis, multi-user whiteboard, and breakout rooms. The platform can also be used for group collaboration and remote teaching. KENET is currently offering this service to its members at no additional cost.
KENET is continuously working to update the features of the Webconferencing facility to serve the needs to the KENET community. You can view the various tutorials on how to register and use the KENET webconferencing facility here: KENET Webconferencing Tutorials.
The updated features are as follows:
1. Network connectivity icon
Participants will now see a network connectivity status icon in the upper right-hand corner in the meeting page.

For moderators, this icon when clicked, they will see a log of their connectivity status as well as a log of the connectivity status for all participants in their session. This will help instructors/presenters see users who have unstable connections through a dialogue that shows recent log of connectivity changes.
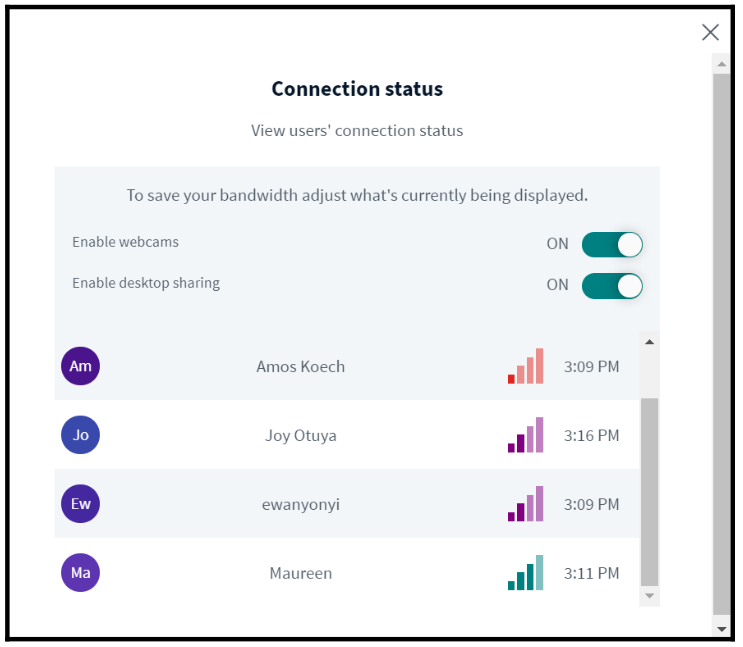
The icon is green when participants have stable connection, Purple when average and red when poor connection is detected. This can inform users to turn off web cam, screen share videos to reduce bandwidth consumption.
2. Raise hand icon
Participants can quickly select the raise hand icon available below the presentation screen to gain instructors attention.
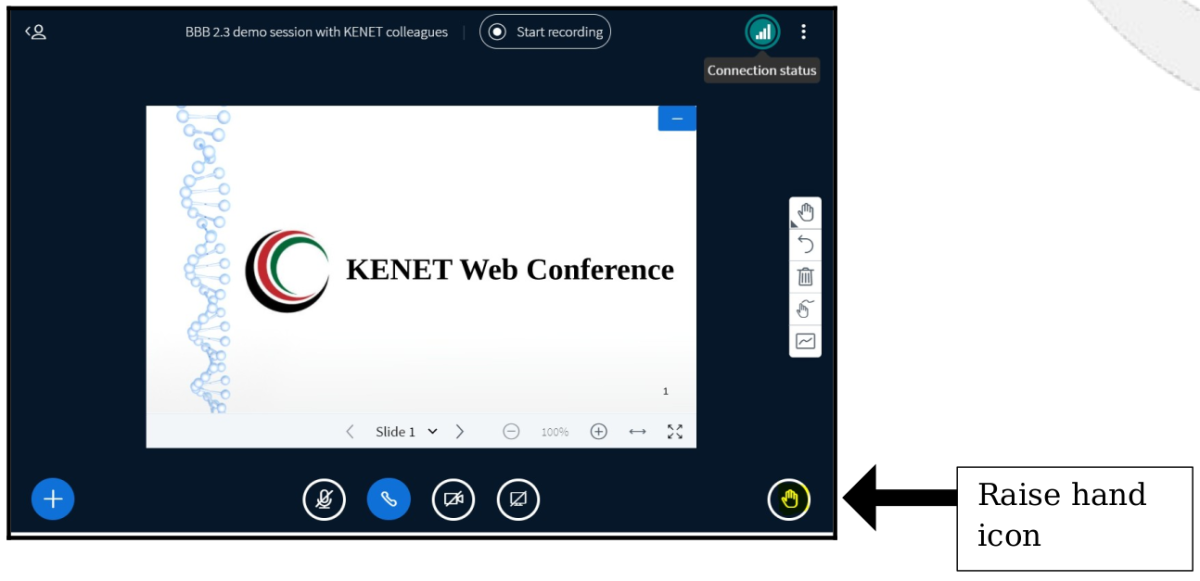
When the raise hand icon is selected, a persistent toast notification will appear.
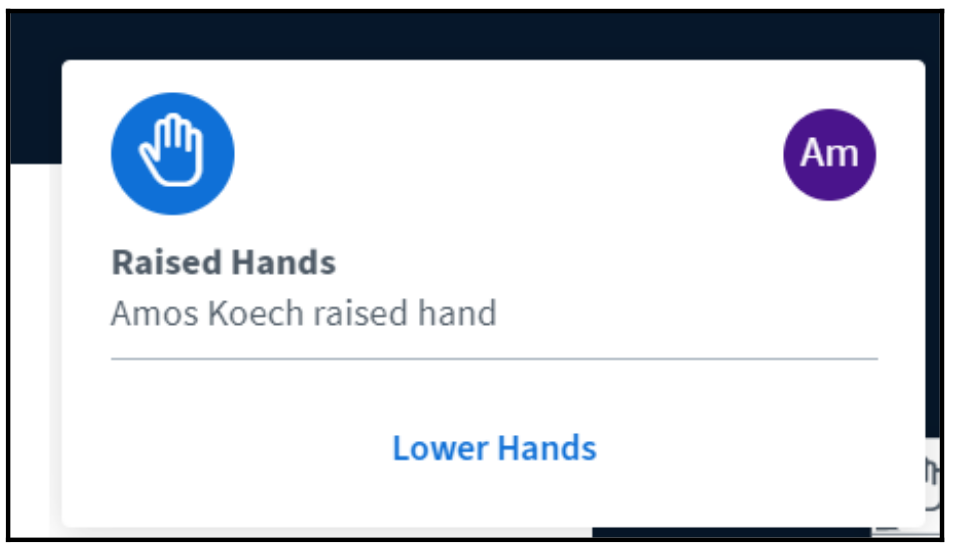
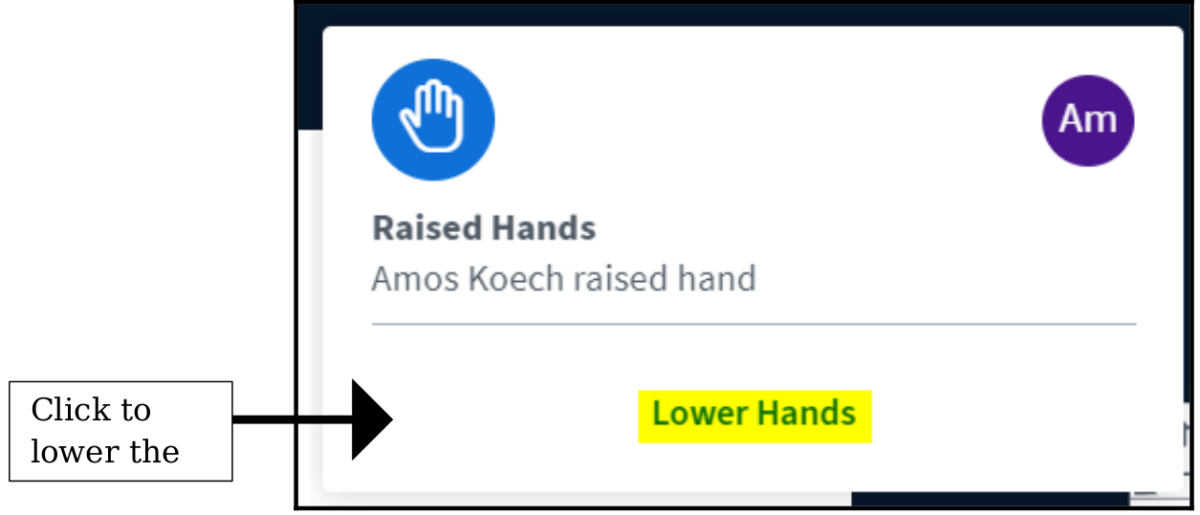
The notification will remain on the screen as long as at least one student has their hand raised. The instructor can lower individual hands by clicking on user’s avatar in the notification.
3. Audio included on chrome screen share
When you screen share using Chrome and choose sharing a Chrome Tab, you can now include system audio from that tab. Users viewing the screen share will be able to hear any audio broadcasted from that tab.
To include the audio, choose Chrome Tab as check the Share audio option in the bottom left-hand corner.

4. Poll
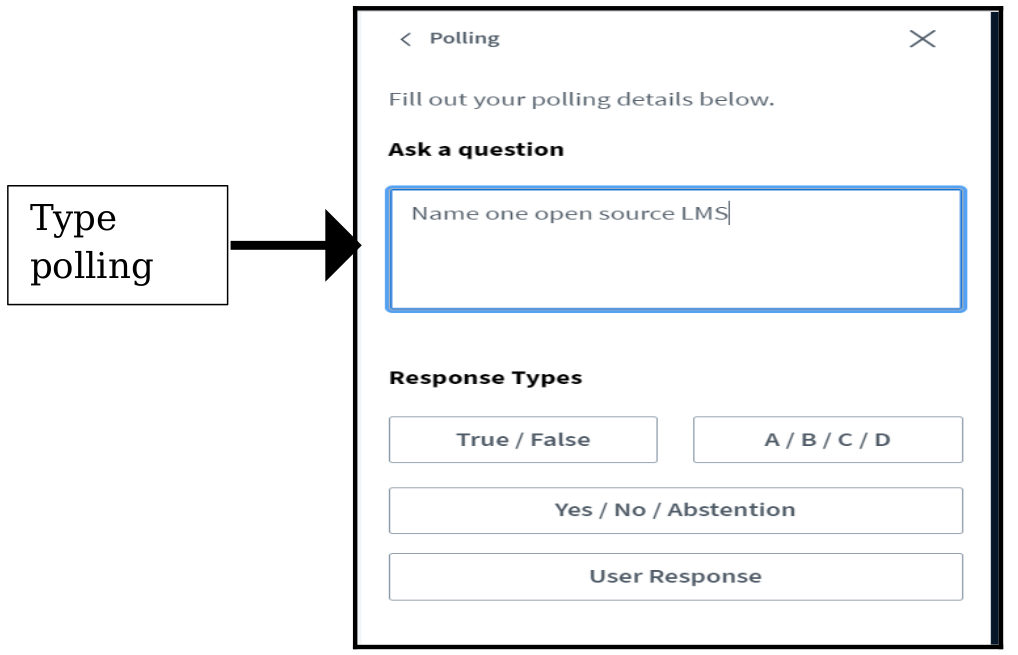
• Typing poll questions
Instructors/presenters have an option of typing their polls in addition to verbally sharing of polls to make it accessible to participants in having access to the questions that require their responses.
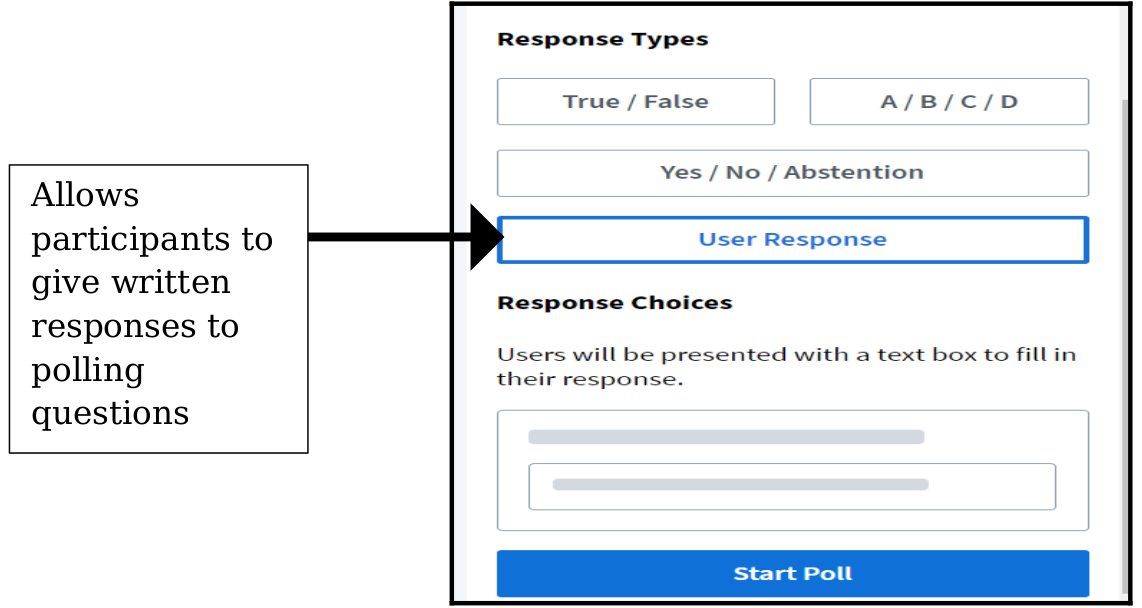
• Written responses
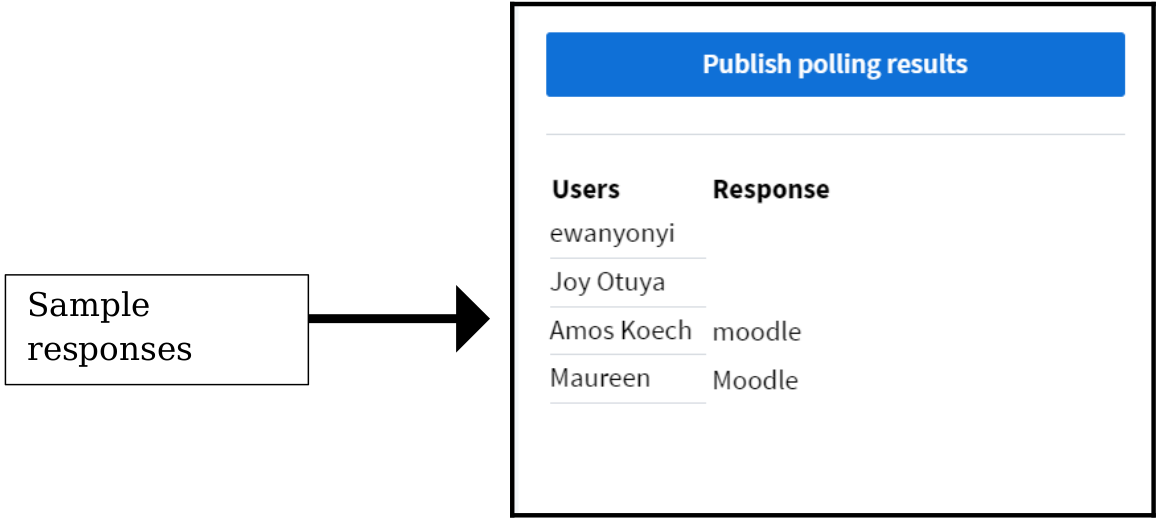
The presenters can as well allow participants to give both closed and open-ended responses by selecting ‘user responses’ on the poll page.
• Poll results displayed in the public chat
The poll results will show on the presentation screen and in the public chat.
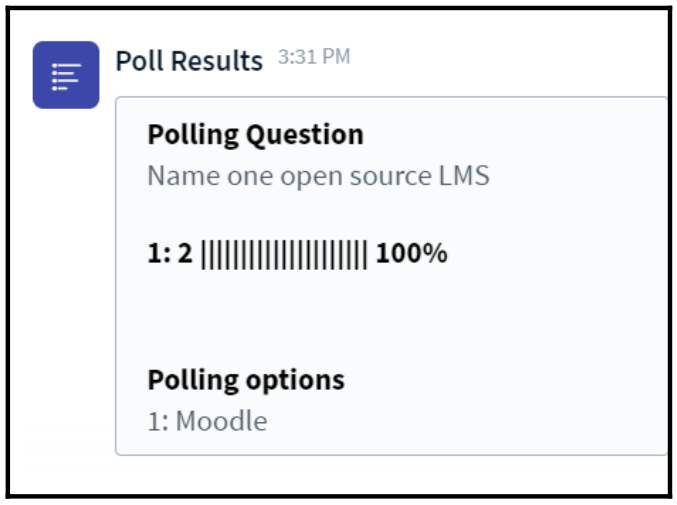
This helps make the poll results visible if screen share is active and presentation is not visible.
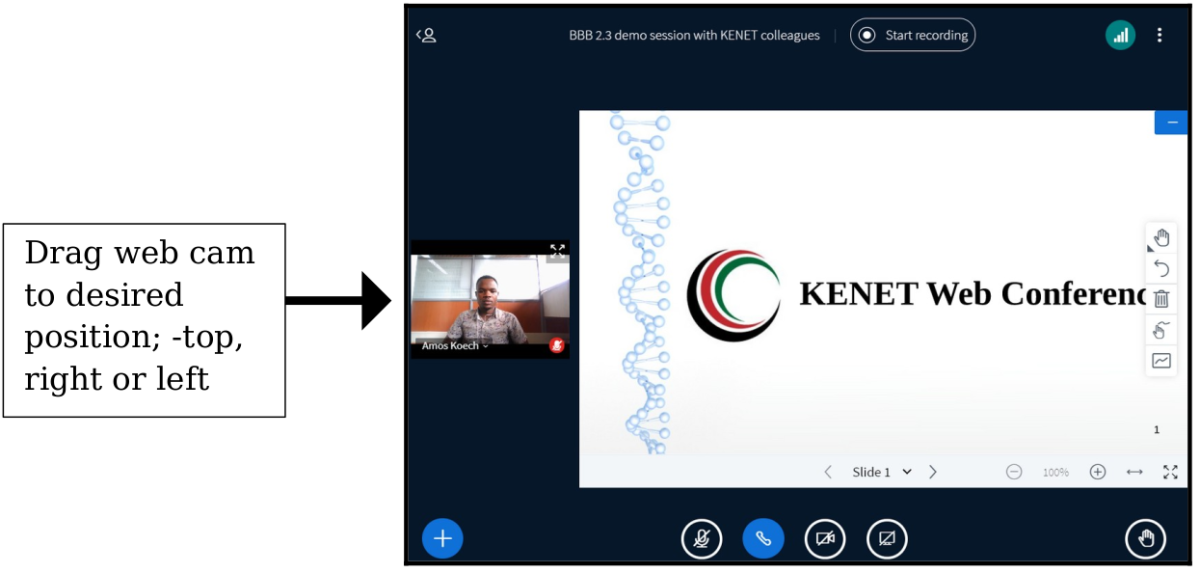
5. Repositioning Web cam
Participants can navigate the web cam to desired position including left, right, top, maximizing the available viewing area for the presentation.
6. Select input/output devices
Click the handset icon to switch between microphones and speakers of choice during a meeting.

The dialogue box will give you a list of any input/output sources available.
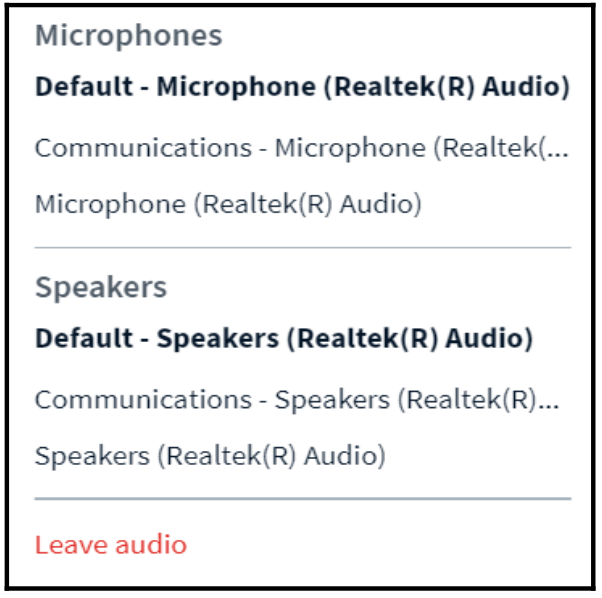
The items on the list are clickable, the user can switch to the preferred source.
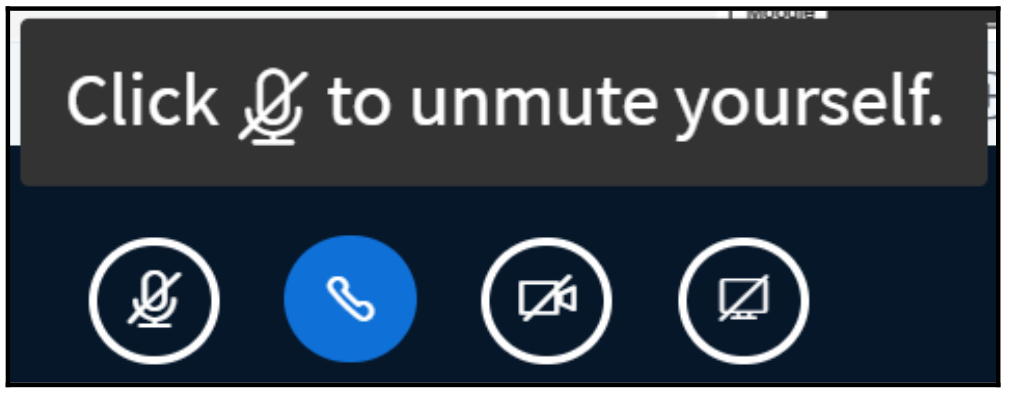
7. Microphone
When talking with a muted microphone, you will get a pop-up message to remind you that you are muted.
8. Allow to pick randomly a user
You can randomly pick a user during a session to undertake a task or answer a question by clicking on the ‘Action’ icon at the bottom left of the presentation screen. Select ‘select random user’.
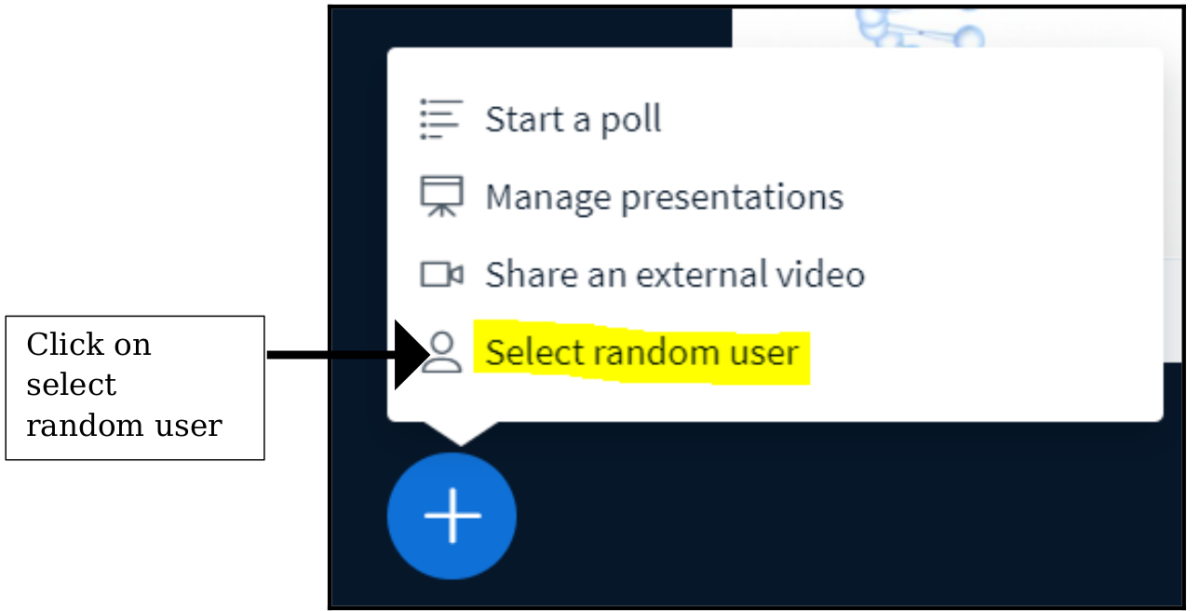
You and the participant chosen will see the choice after a brief animation.
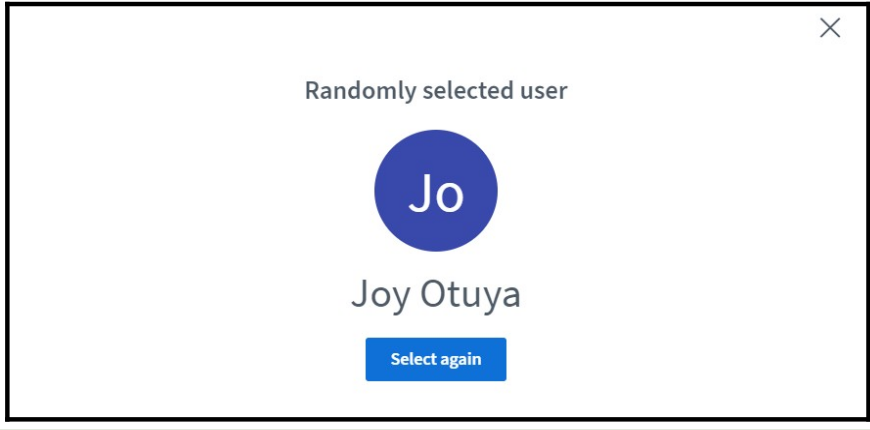
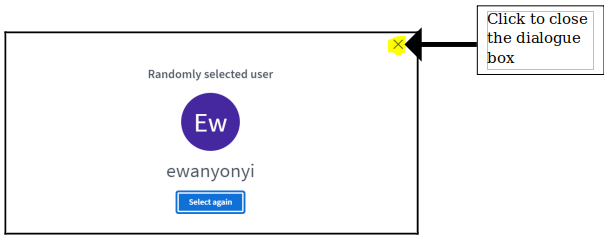
You can close the dialogue window when the issue has been addressed by clicking on the ‘x’
9. Upload slides/presentation in the background
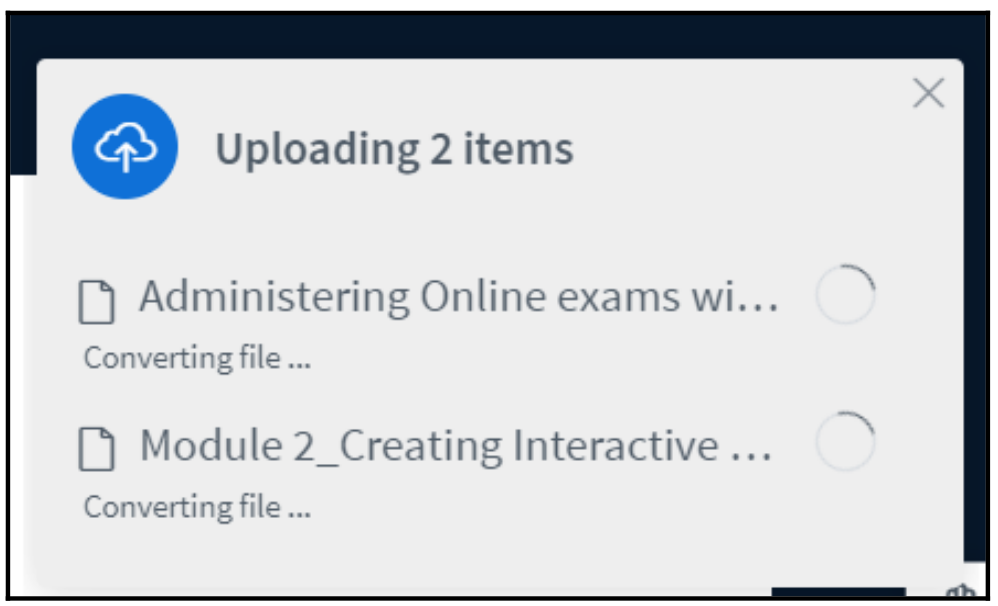
When the presenter/ instructor upload slides, they immediately return to the main window and can continue to engage participants as the slides upload in the background.
10. Quickly choose a presentation
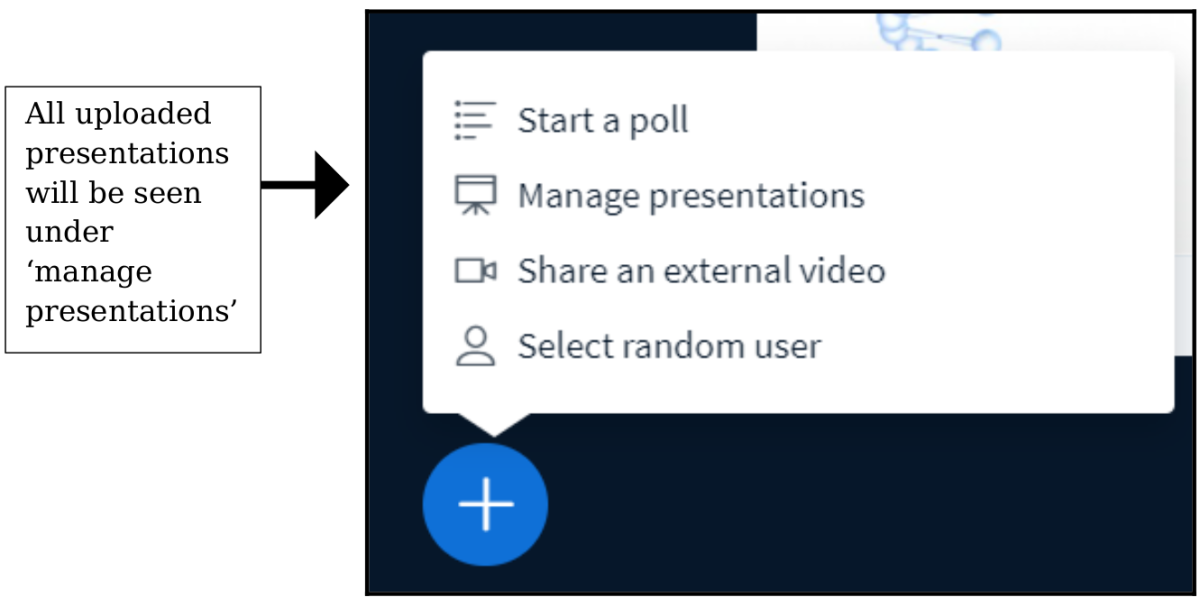
When you upload more than one presentation, the action menu ‘+’ shows a list of all uploaded presentations, making it very easy to switch between them.
11. Guest waiting policy
Instructors/presenters can apply the guest policy during a session. To apply the guest policy; -on the list of users, click on the gear menu and select ‘guest policy’
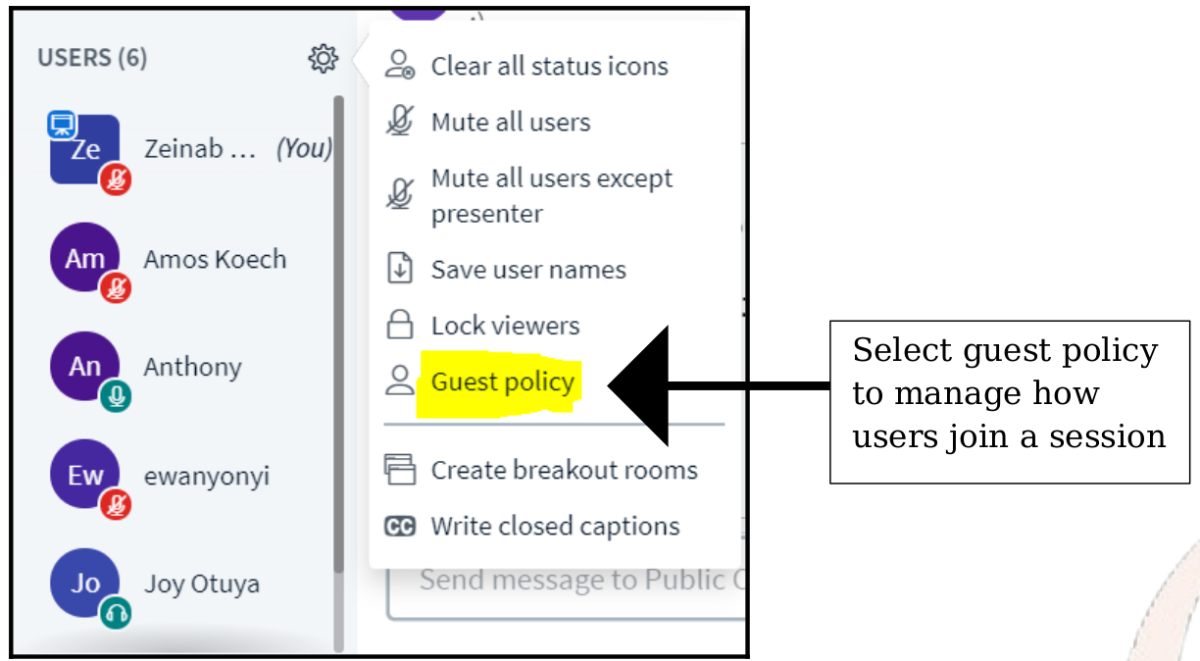
You will hen select the desired guest policy.
12. Per-user whiteboard
You can give a specific participant the ability to write on the whiteboard instead of all users in a session. To do that; - Click on the name of the participant.

Select ‘give whiteboard access’. Once you have given an individual user whiteboard access, a pen icon appears next to their avatar.
You can revoke individual whiteboard access by clicking their avatar again and choosing ‘Remove whiteboard access’
When granting individual whiteboard access, a count will appear on the multi-user whiteboard icon showing you how many participants you have granted access to the whiteboard.
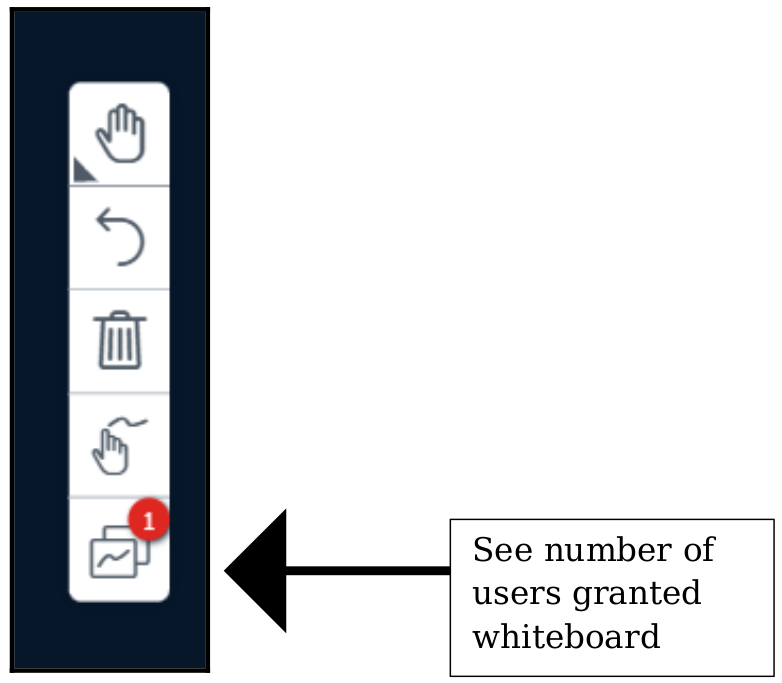
Clicking the multi-user whiteboard icon removes whiteboard access from everyone except the presenter.
