You are here
UPDATED FEATURES IN KENET WEB CONFERENCE PLATFORM V2.6
- Posted on: 1 November 2023
- By: admin
1.Propagate layout to all participants
Moderators have the ability to apply their layout to all participants.
To do this, open the actions menu by clicking the (+) button, and then choose “Propagate layout”.
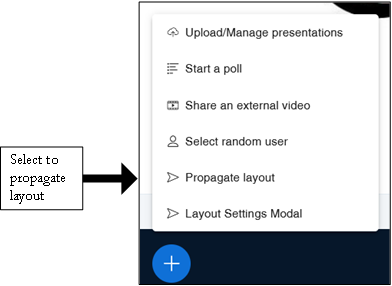
When you select "Propagate Layout," it ensures that the layout you have configured is enforced for all participants, so they see the same arrangement of video streams, presentations, chat, and other elements on their screens.
This can be useful when you, as a moderator or presenter, want to ensure a consistent viewing experience for all participants by enforcing a specific layout.
2. Improved layout manager selection
To adjust the screen layout, click on the actions menu by pressing the (+) button and select "Layout Settings Modal."
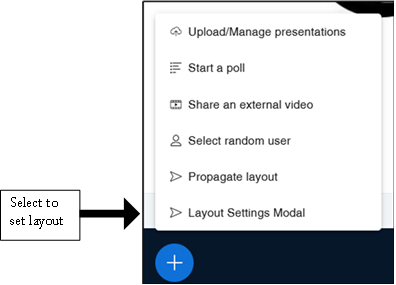
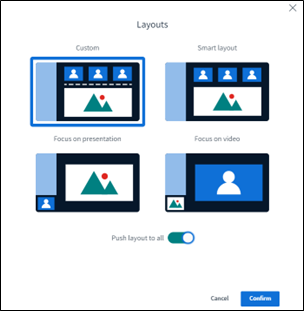
You will see four options to choose from:
- Custom: Allows you to freely position webcams at the top, bottom, or either side of the screen.
- Smart Layout: Displays webcams at the top of the screen, directly below the presentation area.
- Focus on Presentation: Maximizes the main screen for presentations and places webcams at the bottom of the Public Chat window.
- Focus on Video: Maximizes the main screen for webcams and positions the presentation at the bottom of the Public Chat window.
3. Whiteboard Engagement
The whiteboard has been updated with the integration of to draw, a lightweight application that introduces a range of improved drawing functionalities.
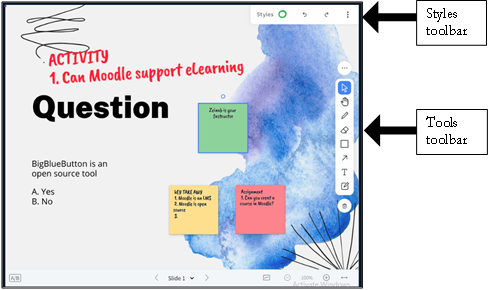
There are two toolbars on the whiteboard. A Styles toolbar and a Tools toolbar.
4. Styles toolbar
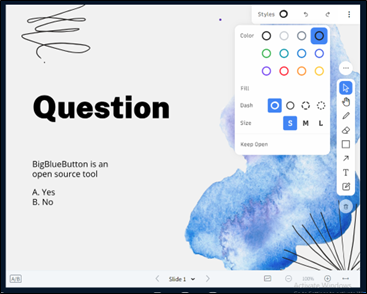
The Styles toolbar provides various options to customize and enhance your drawings on the whiteboard.
It includes tools for choosing different colour line thickness, and line styles for your annotations and drawings. Additionally, you can use the “redo and undo” icons ensuring your whiteboard content looks exactly the way you want it to.
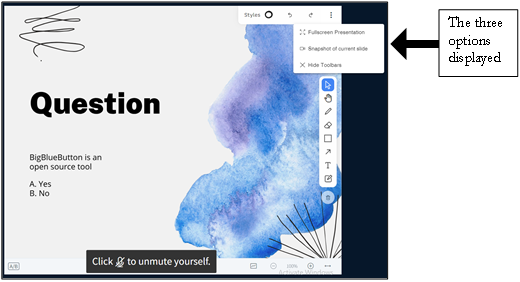
The three dots when selected contain three options-: Fullscreen Presentation, Snapshot of current slide and hide toolbar.
5. Tools toolbar
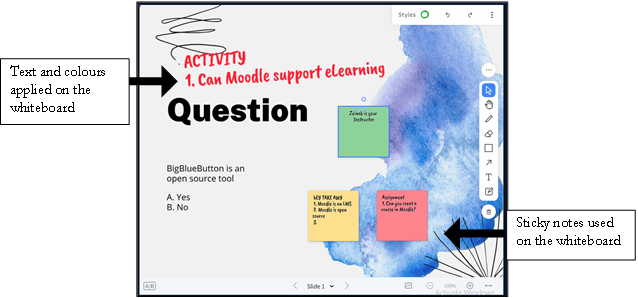
The Tools toolbar offers a range of drawing and annotation tools to help you create and interact with content on the whiteboard.
It includes options for freehand drawing, adding text, shapes, lines, arrows, Text, Sticky Notes, and Delete icon.
6. Easier moving of users between breakout rooms
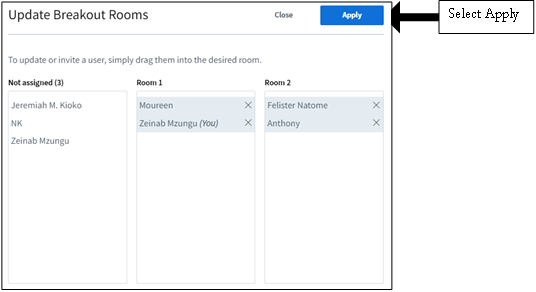
As a moderator you can move users from one breakout room to another in the middle of a breakout session by clicking on the “three dots” under breakout rooms then selecting the “manage users” from the options displayed.

Once that is selected, a dialogue box will appear allowing you to drag and drop users between different breakout rooms.
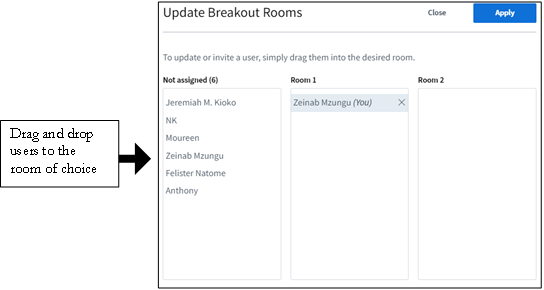
When you click “Apply”, the selected participants will receive a notification to move them to the target breakout room.
7. Exporting breakout rooms' shared notes to the main room
To capture a breakout room's shared notes, select the option “Capture shared notes when breakout rooms end” while setting up the breakout rooms.
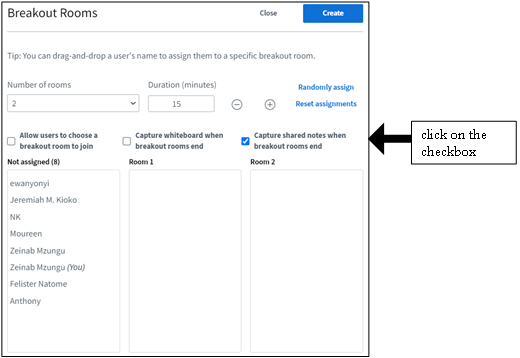
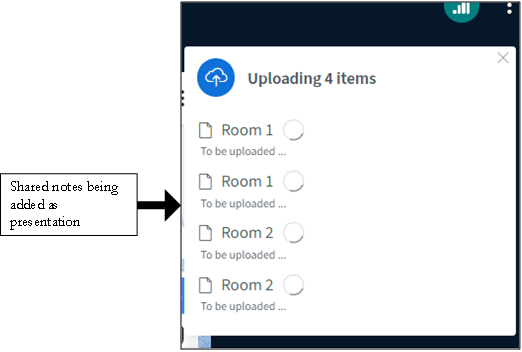
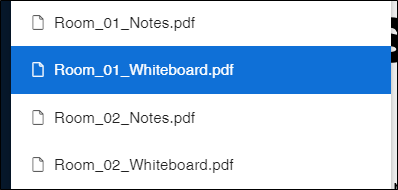
When the breakout rooms end, the shared notes will be converted to a pdf and be available as a presentation from the action menu.
8. Exporting breakout rooms' whiteboard annotations to the main room
To capture the breakout rooms' whiteboard annotations, select the option “Capture whiteboard when breakout rooms end” while setting up the breakout rooms.
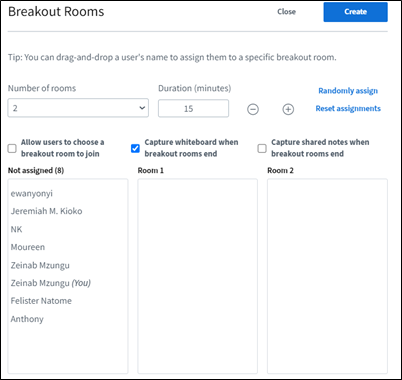
When the breakout rooms end, the whiteboard will be converted to a pdf and be available as a presentation from the action menu.
9. Upload your own webcam background image
When sharing web cam, participants can select between several backgrounds available on the preview window or upload custom background image for their webcam. To upload a custom background image click on the plus (+) button.
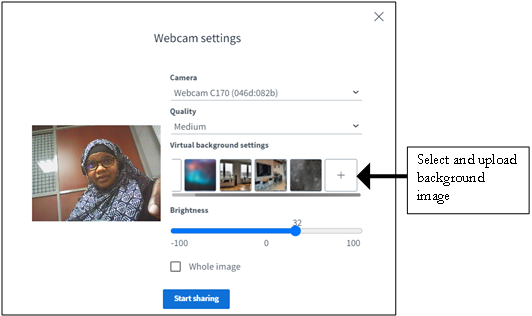
You will then be able to select a background image to upload from your computer. The selected image will show up in the first position on the left in the list of available backgrounds to use.
10.Set webcam image brightness
When using the webcam feature, participants can conveniently modify the brightness levels of their webcam feed or both the webcam and background image.
To achieve this, participants simply need to access the webcam controls located at the bottom and utilize the brightness slider.
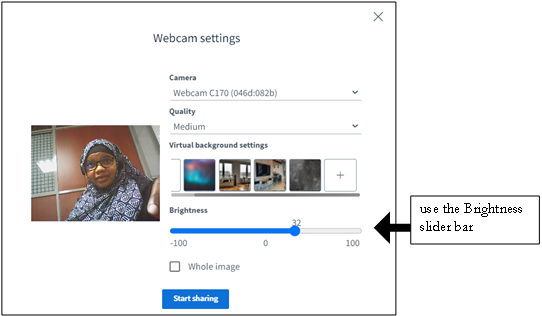
This helps participants to easily fine-tune their visual appearance according to their preferences and lighting conditions.
11. Allow pinning of more than one webcam
As a moderator, you have the ability to “pin” the webcams of specific participants, including sign language interpreters and language interpreters.
This action can be executed by clicking on the webcam feed of the designated individual and opting for the “pin” feature.
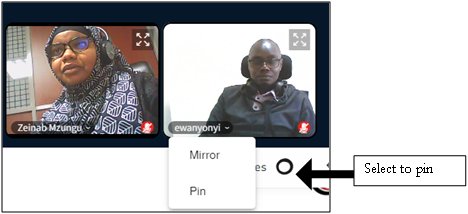
This ensures that the chosen participant's video remains fixed and prominently visible throughout the session.
12. Dark Theme
The KENET Web conference platform offers participants the choice of an alternative visual style – dark mode.
To activate this feature, simply click on the three dots located at the top right corner, then select the “Settings” menu.

Toggle on the “Dark mode” option.
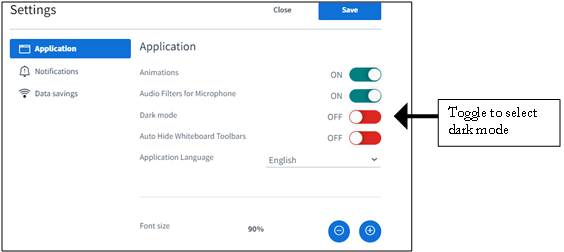
This selection triggers a darker colour scheme designed to improve visibility and alleviate eye strain, especially in low-light environments
13. Moving shared notes to the whiteboard as presentation
Moderators can move the shared notes to the whiteboard presentation as presentation.
To do this, select the three dots in the top right corner of the Shared Notes window and select “Convert notes to presentation”.

The Shared Notes will then be converted and displayed in the presentation area.
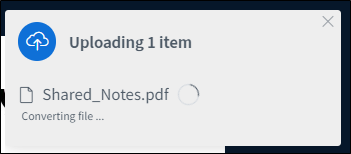
The Shared Notes will then be available as a presentation in the “action menu” and can then be marked up on the whiteboard.
14. Pin the shared notes to the whiteboard presentation
Moderators/instructors can now pin shared notes to the whiteboard presentation area for further collaborative work among participants.
To do this select the three dots in the top right corner of the Shared Notes window and select “Pin notes onto whiteboard”.

To unpin the shared notes, press the X button on the top right-hand side of the whiteboard area.
15. Smart Slides
Smart slides enable a presenter to prepare a polling slide deck in advance or include polling questions in their regular content.
With smart slides, BigBlueButton detects when a question is being posed and provides a quick polling option to the presenter.
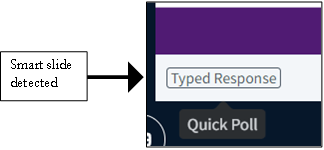
To create smart slides, ensure you are using the format: "question" followed by "reply options".
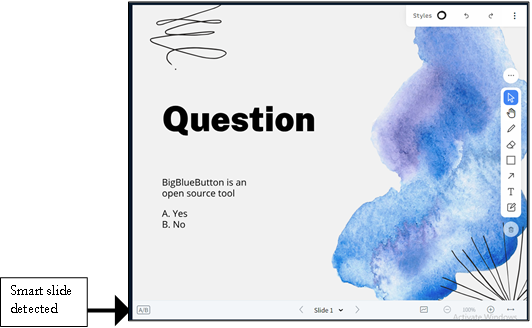
We recommend using the following reply options for best results:
- True/False
- Yes/No
- Multiple Choice A/B
When questions and reply options are displayed, the BigBlueButton detects the intended poll and provides the presenter with a Quick Polling button.
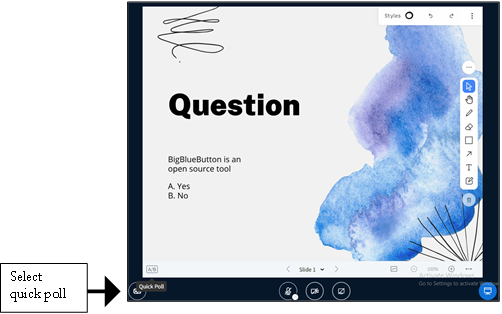
Select the quick polling button to initiate the poll without navigating through the action menu or using the polling menu.
You can even have multiple questions on the same page then choose which one you want to use for a poll.
Once participants complete the polls, the results can be displayed on the presentation window and on the public chat.
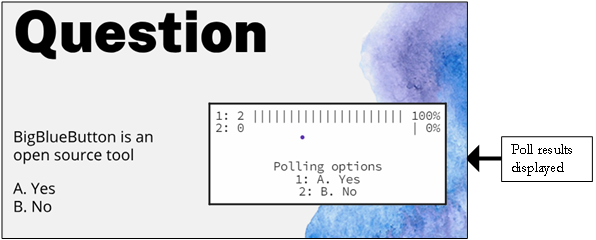
You can stretch the response box to fit the presentation window.
